 Save
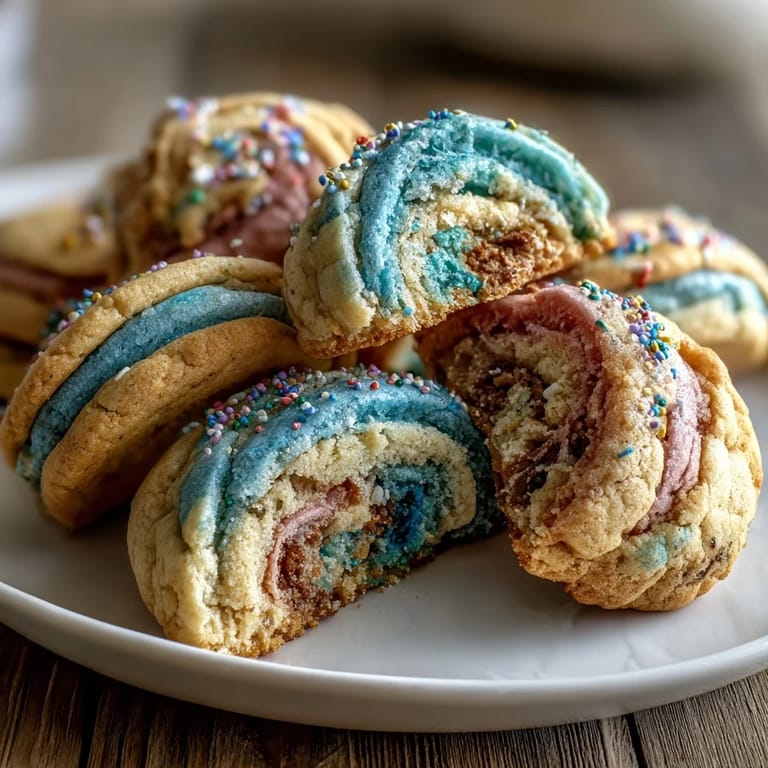
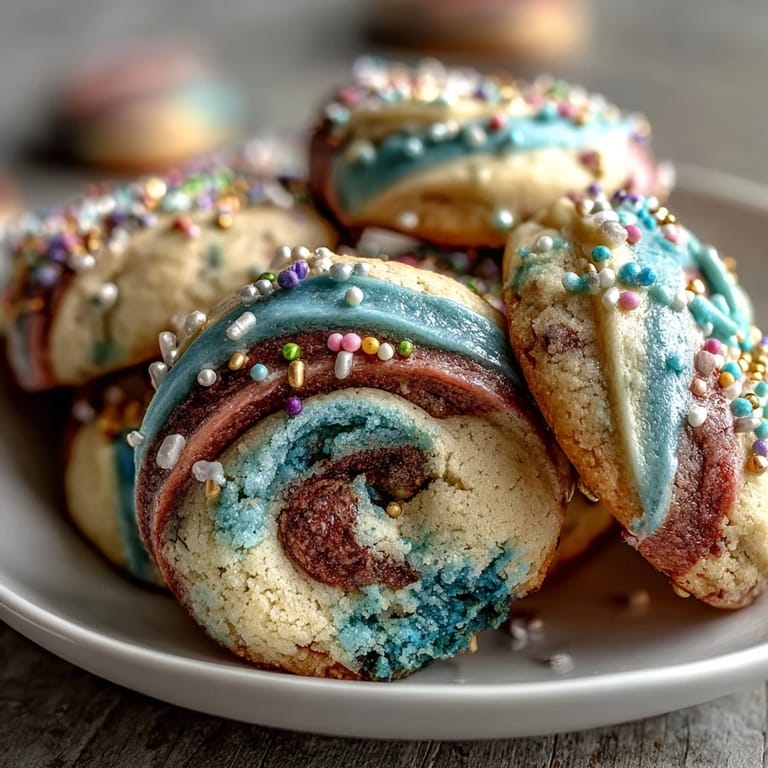
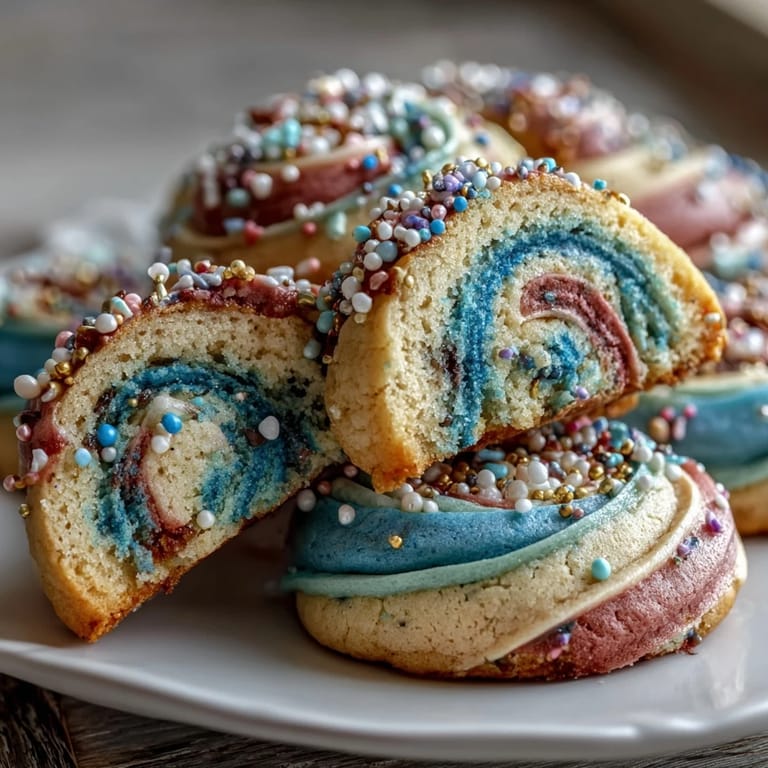
Save My niece opened her birthday present last year to find a batch of these pastel swirl cookies, and the way her eyes lit up watching the colors spiral through each bite made me realize I'd stumbled onto something magical. These aren't just cookies—they're edible confetti, soft and buttery with that perfect tender crumb that melts on your tongue. The inspiration came from Cookie Run Kingdom, that whimsical mobile game she wouldn't stop talking about, and I wanted to capture that same playful, colorful energy in something homemade. What started as a Pinterest search turned into an afternoon of gentle kneading, experimenting with color combinations, and discovering that the secret to perfect pastel swirls isn't precision—it's restraint.
I'll never forget pulling the first batch from the oven during a rainy Tuesday afternoon, when the kitchen smelled like pure butter and vanilla, and my friend texted asking what I was making. By the time she arrived, the cookies had cooled enough to photograph, and she immediately asked if I could make them for her daughter's rainbow-themed party. That moment taught me that home baking isn't about perfection—it's about creating something beautiful enough to share, delicious enough to remember.
Ingredients
- All-purpose flour (2 1/2 cups): The foundation that gives these cookies their tender, melt-in-your-mouth texture; measure by spooning into a cup and leveling rather than scooping directly from the bag to avoid packing too much flour.
- Unsalted butter (1 cup, room temperature): Non-negotiable for flavor control and proper creaming; cold butter won't incorporate air, and salted butter throws off the sweetness balance you're carefully building.
- Granulated sugar (1 cup): Creates that slight crispness at the edges while keeping the center tender, the exact texture that makes people reach for seconds.
- Large egg: Binds everything together without making cookies cake-like; room temperature eggs blend more smoothly into the butter mixture.
- Vanilla and almond extracts: Two teaspoons vanilla is the sweet spot for flavor depth, while the optional almond extract adds a whisper of sophistication that nobody can quite identify but everyone loves.
- Gel food coloring (pastel shades): Gel is non-negotiable over liquid because it won't dilute your dough; those soft pink, lavender, and sky-blue hues are what make these cookies Instagram-worthy.
- Pastel sprinkles: A finishing touch that looks intentional and celebratory without overwhelming the buttery flavor of the cookie itself.
Tired of Takeout? 🥡
Get 10 meals you can make faster than delivery arrives. Seriously.
One email. No spam. Unsubscribe anytime.
Instructions
- Combine your dry ingredients:
- Whisk flour, baking powder, and salt together in a medium bowl and set aside; this distributes the leavening agent evenly so your cookies rise gently and uniformly.
- Cream butter and sugar until clouds form:
- Beat room-temperature butter with sugar for about two to three minutes until the mixture looks light, pale, and fluffy—this step is where you're incorporating air that makes cookies tender rather than dense. Stop occasionally to scrape down the bowl because hidden butter lurking on the sides won't blend properly.
- Add the wet ingredients gently:
- Mix in the egg, vanilla, and optional almond extract until everything looks cohesive and creamy. The mixture should look homogeneous, not separated or curdled.
- Bring the dough together without overworking:
- Add your dry ingredients to the wet mixture and mix just until you don't see any white streaks of flour anymore—this takes maybe thirty seconds once you start. Overmixing develops gluten and makes cookies tough, which is the opposite of what you're after.
- Divide and color your dough:
- Split the dough into three or four portions depending on how many colors you want, then knead a small amount of gel coloring into each piece until the color distributes evenly. Your hands might get tinted, but that's part of the fun.
- Roll ropes and create the swirl:
- Roll each colored portion into a long rope about twelve inches long, then lay them side by side and gently twist them together like you're braiding hair. The loose twist preserves those beautiful color streaks instead of blending everything into one muddy shade.
- Chill your masterpiece:
- Wrap the twisted log in plastic wrap and refrigerate for at least two hours; the cold firms up the butter so your swirls hold their shape when you slice and bake. This patience is what separates cookies that hold their pattern from ones that spread into formless blobs.
- Slice and bake with intention:
- Preheat your oven to 350°F with parchment paper lining the baking sheets, then use a sharp knife to cut thin rounds about one-quarter inch thick. Space them about two inches apart because they'll spread slightly, and top with sprinkles if you want that finishing touch.
- Watch them carefully in the oven:
- Bake for ten to twelve minutes until the edges just barely begin turning golden—the centers should still look slightly underbaked because they'll continue cooking on the hot pan after you remove them. This is the difference between tender cookies and hard, crispy ones.
- Cool with patience:
- Let them sit on the baking sheet for five minutes so they set enough to move without breaking, then transfer to a wire rack to cool completely. Eating them warm is tempting, but waiting lets the structure fully set and the flavors settle.
 Save
Save There's something almost meditative about rolling out those colored ropes and twisting them together, knowing that the swirl you create will become part of someone's memory of celebration. When my neighbor's son came home from school to find these cooling on my counter and asked if he could have one for his lunchbox the next day, I realized that the most successful recipes are the ones that become small traditions, the ones people remember and ask for again.
The Magic of Gel Coloring
I learned the gel coloring lesson the hard way after my first attempt with liquid food coloring left me with dough that felt more like cookie paste than something workable. Gel coloring sits on top of the dough and kneads in smoothly without adding any moisture, which means your cookies stay tender and bake evenly. The pastel shades are especially forgiving because they don't require as much coloring to achieve that soft, dreamy appearance that makes these cookies so visually striking.
Storage and Make-Ahead Magic
These cookies are genuinely freeze-friendly, which means you can prepare the dough weeks in advance and bake fresh cookies whenever the craving strikes or an unexpected celebration pops up. Wrap the colored dough log tightly in plastic wrap, then pop it in a freezer bag for up to two months—just add a minute or two to your baking time if baking from frozen. Once baked, store them in an airtight container at room temperature, and they'll stay soft and delicious for up to five days, though honestly they rarely last that long in any kitchen I know.
Flavor Variations Worth Exploring
The beauty of this base recipe is that it's incredibly adaptable to your mood and the occasion you're celebrating. The optional almond extract already hints at sophistication, but you could also stir in the zest of one lemon or orange for brightness, or a pinch of cinnamon for warmth during autumn celebrations. Even adding a quarter teaspoon of peppermint extract creates Christmas magic, and these small additions feel luxurious without complicating the baking process.
- Citrus zest brightens the vanilla backbone and makes these cookies feel fancy enough for a grown-up tea party.
- A tiny pinch of cardamom or rose water takes these to Middle Eastern territory and surprises people in the best way.
- Crushed freeze-dried strawberries stirred into the dough add natural sweetness and a subtle flavor boost that pairs beautifully with pastel pink coloring.
 Save
Save Baking these cookies is less about following orders and more about understanding the small moments that make something special—the way butter and sugar cream into clouds, how colors knead into dough like you're painting with your hands, the patience of waiting for that perfect golden edge. They're proof that homemade magic doesn't require fancy equipment or years of experience, just attention and a little bit of love mixed into every batch.
Recipe FAQs
- → What makes the swirls vibrant in these cookies?
Gel food coloring is used to tint the dough, providing intense pastel hues without altering texture or consistency.
- → How should the dough be prepared for the swirl effect?
The dough is divided into portions, each tinted with different colors, rolled into ropes, twisted together, then chilled before slicing.
- → Can these treats be frozen?
Yes, the cookies freeze well for up to two months when stored in an airtight container.
- → What tips ensure a tender, crisp texture?
Chilling the dough thoroughly and baking until edges are just golden helps maintain a soft center with a slightly crisp exterior.
- → Are there any suggested flavor enhancements?
Adding lemon or orange zest to the dough can provide a bright citrus note to complement the sweetness.