 Save
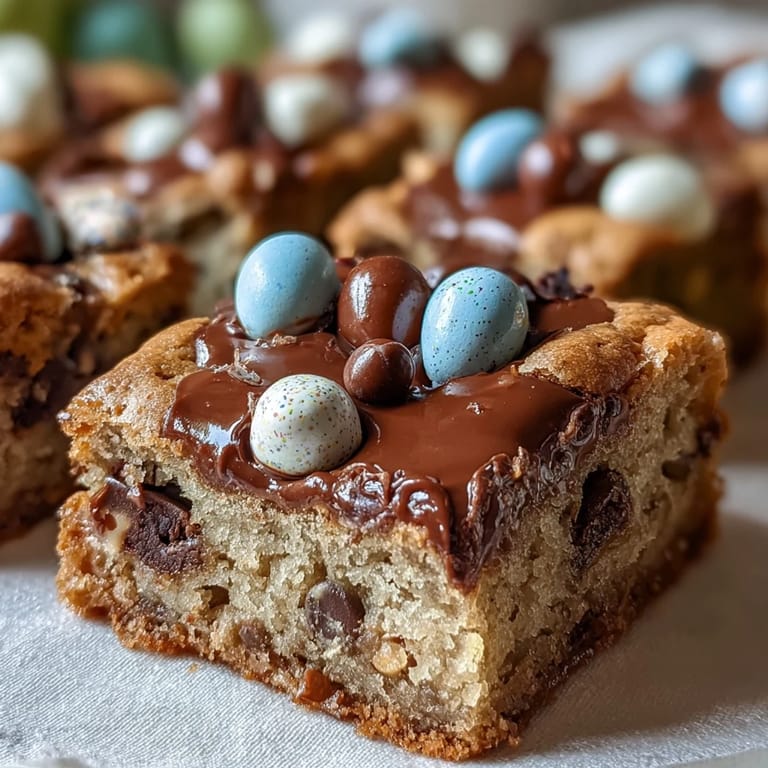
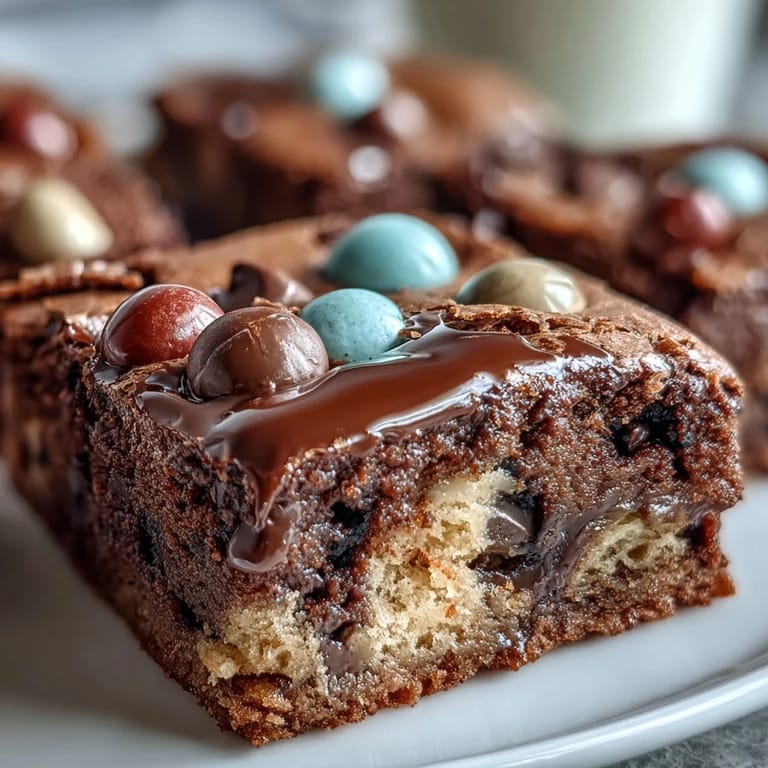
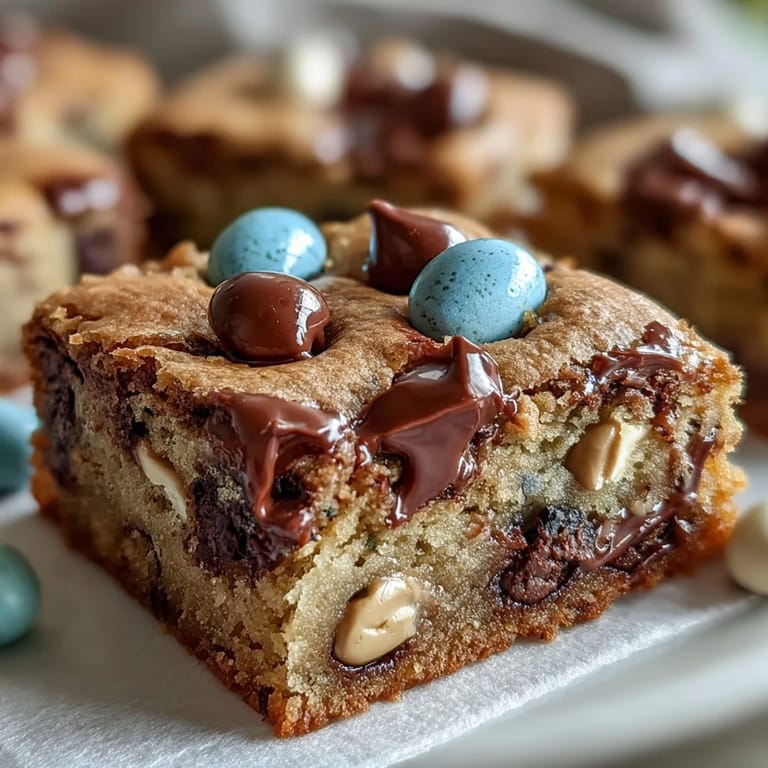
Save There's something mischievously satisfying about sneaking a handful of pastel Easter egg candies before tossing them into a bowl of cookie dough. Last spring, the scent of melting chocolate mixed with warm peanut butter drifted through my kitchen as I hurried to finish these bars before my family returned from their afternoon walk. The anticipation of colorful treats peeking through golden tops made the whole process feel like a mini celebration, no matter the weather outside. These Peanut Butter Easter Egg Cookie Bars always seem to liven up a grey day, and I've come to look forward to that cheerful mess of chocolate, peanut butter, and candy color covering my countertops. Sometimes, the clinking sound of mixing bowls is the only sign of spring I need.
One rainy April afternoon, my neighbor's kids darted inside just as the timer for these bars beeped. A trio of little noses pressed up to the oven window, each waiting for the moment we could slice into those warm, melt-in-your-mouth bars and argue over which piece had the most candy on top. We laughed as chocolate smeared across eager cheeks, and the house hummed with sugar-fueled giggles. I can still picture the sprinkles of pastel color dotting the kitchen floor, footprints of a perfect spring day spent together.
Ingredients
- Unsalted butter: Melting and letting it cool slightly gives the bars extra chew and prevents greasy spots.
- Creamy peanut butter: I always opt for a classic commercial brand for ultimate smoothness and nostalgia.
- Light brown sugar: This brings out a subtle caramel note that balances the saltiness of the peanut butter.
- Granulated sugar: Adds just the right amount of crisp edge and sweetness.
- Eggs: Room temperature eggs blend more effortlessly, yielding an even crumb.
- Vanilla extract: Treat yourself to real vanilla for a touch of warmth and depth behind the sweetness.
- All-purpose flour: Always fluff and spoon into the cup for accuracy; too much makes for dry bars.
- Baking powder & baking soda: The dynamic duo lifts and lightens the dense dough so every bite feels just right.
- Salt: A pinch pulls the flavors together in every mouthful.
- Easter egg chocolate candies: Choose sturdy, candy-coated chocolates that won't melt away and look festive even after baking.
- Semi-sweet chocolate chips (optional): A handful mixed in means pockets of melted chocolate in every slice.
Tired of Takeout? 🥡
Get 10 meals you can make faster than delivery arrives. Seriously.
One email. No spam. Unsubscribe anytime.
Instructions
- Set the stage:
- Preheat your oven to 350°F (175°C) and line a 9x9-inch baking pan with parchment, making sure to leave an overhang for an easy lift later.
- Whisk the wet magic:
- In your largest mixing bowl, combine melted butter, peanut butter, brown sugar, and granulated sugar, whisking until silky smooth and inviting.
- Add eggs and vanilla:
- Crack in both eggs and pour in the vanilla, whisking gently until the mixture is pale and slightly thickened.
- Mix the dry team:
- In a separate bowl, fluff up the flour, baking powder, baking soda, and salt with a quick whisk.
- Bring it all together:
- Gradually fold the dry mixture into the wet using a spatula, pausing once the streaks of flour disappear; don't overmix.
- Stir in the fun:
- Fold in most of the Easter egg candies and chocolate chips for a studded, playful dough.
- Spread and top:
- Gently scoop the dough into your prepared pan, smoothing it out, then press the remaining candies on top for extra bursts of color.
- Bake to perfection:
- Bake for 22 to 25 minutes until the edges turn golden and the center is set but just soft enough to wobble slightly.
- Cool and slice:
- Let the bars cool fully in the pan; then, use the parchment to lift them out, slice into neat squares, and serve to giggles and applause.
 Save
Save One bite and suddenly, a simple treat turned into a centerpiece, with everyone crowding around and reaching for the crispiest, most candy-filled corner. Sharing these bars at my cousin's birthday last year, I realized they weren't just dessert—they became the thing everyone remembered, long after the candles had been blown out.
Make-Ahead and Storage Tricks
After plenty of trial and error, I've learned these bars stay blissfully chewy for days if sealed tight in an airtight container. If you somehow don't finish them all in one go, tucking a slice of bread in the container (just like with cookies) keeps every bite as soft as the day they were baked.
Switch It Up for Any Season
Leftover Christmas or Halloween candy finds a happy home in this base recipe too. Springtime is simply my favorite excuse for a swirl of pastel hues, but even ordinary M&Ms or chopped peanut butter cups work wonders.
The Best Kitchen Lessons (And a Few Mishaps)
If your oven runs hot, shave a minute off the bake time for ultra-gooey centers—they'll set as they cool. Don't stress over perfect spreading either: a slightly rustic, uneven top actually makes every bar unique and inviting.
- Keep parchment overhang handy for clean lifting.
- Reserve a small handful of candies for a vibrant finish.
- Let cool before slicing for neat, bakery-style edges.
 Save
Save Let the aroma of peanut butter and melting chocolate draw everyone to your kitchen, and never underestimate how much joy a scattering of candies can bring. Wishing you many color-splashed, sweet spring moments ahead!
Recipe FAQs
- → Can I use crunchy peanut butter?
Yes, using crunchy peanut butter adds texture and extra nuttiness. The bars will still be soft and delicious.
- → Are other candies suitable for these bars?
Absolutely! Swap in any chocolate candies—such as M&Ms or chocolate chips—for a different twist.
- → How do I store the bars for freshness?
Keep bars in an airtight container at room temperature for up to four days to maintain their chewy texture.
- → Can these bars be made gluten-free?
Replace all-purpose flour with your favorite gluten-free blend for a wheat-free version. Check candy labels for gluten.
- → What is the best way to slice the bars cleanly?
Let the bars cool fully in the pan, then use the parchment to lift out. Slice with a sharp, clean knife for neat edges.
- → Can I freeze these bars for later?
Yes, wrap individual bars tightly and freeze for up to three months. Thaw at room temperature before enjoying.