 Save
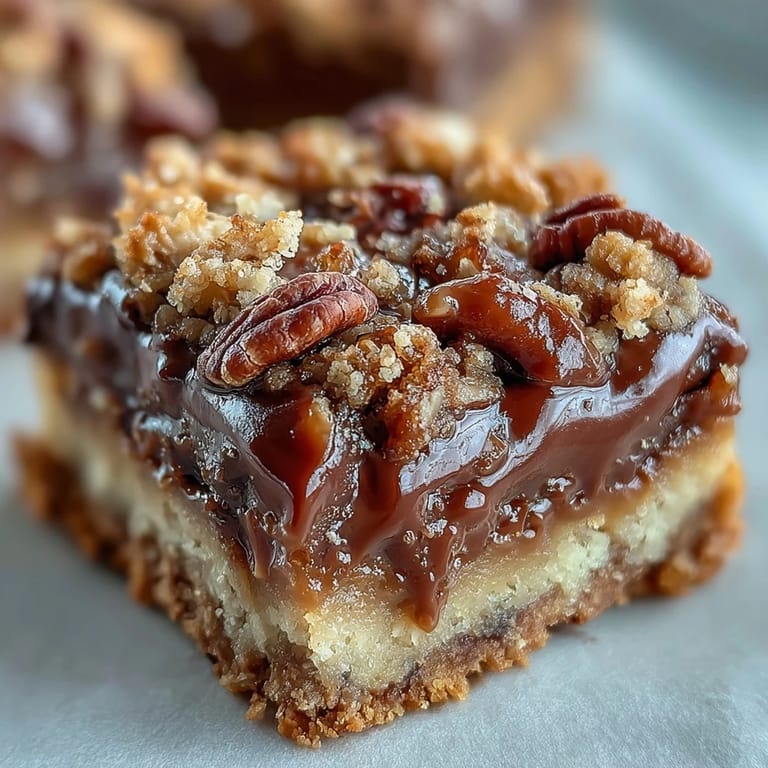
Save My neighbor showed up at my door one Saturday morning holding a pan of something that smelled like a candy shop. She called them turtle bars, and after one bite I understood why she made them every month. The oats gave them a chew that outlasted any brownie, and the caramel didn't just sit on top, it soaked down into every layer. I asked for the recipe on the spot, and she laughed and said I'd be making them for everyone I knew within a week.
I brought a batch to a potluck once, and they vanished before the main course even hit the table. Someone asked if I'd ordered them from a bakery, which made me feel like a wizard. A dad with two kids came back three times, sneaking squares when he thought no one was looking. That night I realized these bars had a kind of magic that made people drop their manners and just reach for more.
Ingredients
- All-purpose flour: Forms the sturdy base that holds up under all that caramel weight without turning soggy.
- Rolled oats: The secret to that chewy texture, they soak up butter and sugar and crisp up beautifully in the oven.
- Brown sugar: Adds a molasses depth that makes the crust taste almost like toffee.
- Granulated sugar: Balances the brown sugar and keeps the crumble from getting too dark or heavy.
- Unsalted butter, melted: Melted butter creates those crumbly clusters that make the topping so addictive.
- Salt: Just a pinch cuts through all the sweetness and makes every other flavor pop.
- Baking soda: Helps the crust puff up slightly so it's tender, not dense.
- Semi-sweet chocolate chips: They melt into puddles when you pour caramel over them, creating swirls of fudgy richness.
- Chopped pecans: Toasted pecans bring a nutty crunch that mimics classic turtle candies.
- Caramel sauce: Store-bought works perfectly, but homemade caramel takes these bars to another level if you have the time.
- Heavy cream: Thins the caramel just enough to pour smoothly and soak into every corner.
Tired of Takeout? 🥡
Get 10 meals you can make faster than delivery arrives. Seriously.
One email. No spam. Unsubscribe anytime.
Instructions
- Prep the Pan:
- Preheat your oven to 350°F and grease a 9x9-inch pan or line it with parchment paper for easy removal. A little overhang on the sides makes lifting the whole slab out a breeze when it's time to cut.
- Mix the Crumb Base:
- Combine flour, oats, both sugars, melted butter, salt, and baking soda in a large bowl until the mixture looks like wet sand. Reserve one cup of this crumble for topping, then press the rest firmly into the bottom of your pan.
- Bake the Crust:
- Slide the pan into the oven and bake for 10 minutes until the edges just start to turn golden. This pre-bake keeps the bottom from turning mushy under all that caramel.
- Make the Caramel Layer:
- While the crust bakes, warm your caramel sauce and heavy cream in a small saucepan over medium-low heat, stirring constantly until smooth. The cream loosens the caramel so it flows like warm honey.
- Layer the Fillings:
- Pull the crust from the oven and immediately scatter chocolate chips evenly across the hot surface, then add the chopped pecans. The residual heat will start melting the chocolate right away.
- Pour the Caramel:
- Drizzle the warm caramel sauce all over the chocolate and pecans, making sure it reaches the edges. It will pool and spread as it settles.
- Add the Topping:
- Sprinkle that reserved cup of crumb mixture evenly over the caramel layer, creating little clusters. Don't press it down, let it sit loose so it bakes into crisp nuggets.
- Finish Baking:
- Return the pan to the oven and bake for 15 to 20 minutes until the topping turns a deep golden brown. The smell will be intoxicating, but resist cutting into them early.
- Cool and Cut:
- Let the bars cool completely in the pan on a wire rack, at least 30 minutes, so the caramel sets and the layers hold together. Use a sharp knife to cut into 16 squares, wiping the blade between cuts for clean edges.
 Save
Save The first time I packed these bars for a road trip, they survived four hours in a cooler and still tasted perfect when we pulled them out at a rest stop. My friend bit into one and closed her eyes, and for a moment we forgot we were standing next to a highway. That's when I knew this recipe wasn't just about dessert, it was about creating little pockets of comfort no matter where you were.
Choosing Your Caramel
Store-bought caramel sauce is my weekday go-to because it's consistent and saves time, but homemade caramel has a deeper flavor that makes people ask what you did differently. If you go homemade, make sure it's fully cooled before you add the cream or it will bubble up violently. I've also used dulce de leche in a pinch, and it gave the bars a slightly tangy edge that some people loved even more than traditional caramel. Whatever you choose, just make sure it's thick enough to cling to a spoon before you pour it.
Nut Swaps and Add-Ins
Pecans are classic, but walnuts bring a sharper bite and almonds add a delicate crunch that feels a little fancier. I once threw in a handful of toffee bits along with the chocolate chips, and the bars turned into something that tasted like a candy bar exploded in the best way. You can also fold shredded coconut into the crumb mixture for a twist that leans tropical. Just keep the total add-ins under two cups or the structure starts to fall apart.
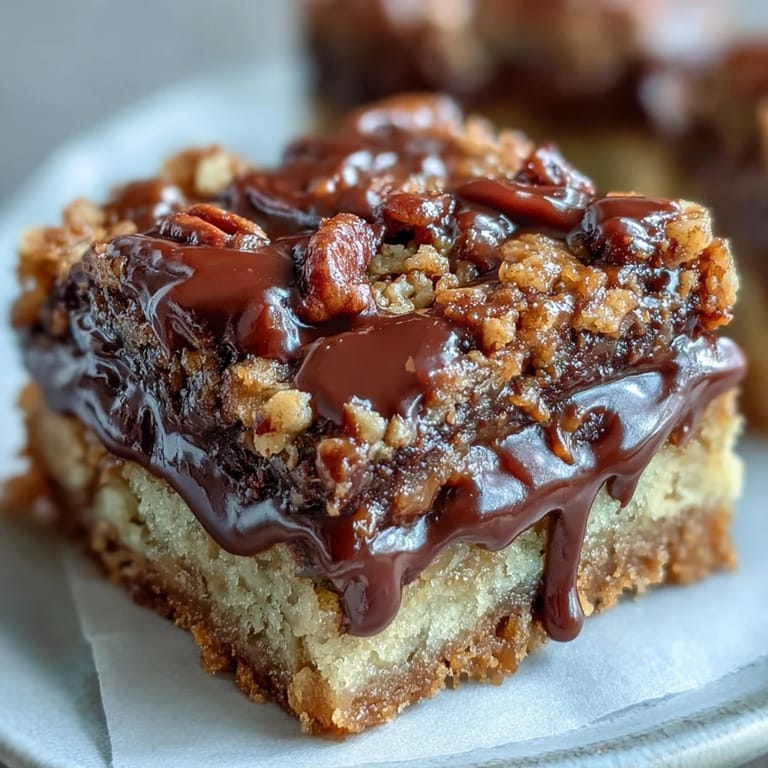
Storage and Gifting
These bars keep for a full week in an airtight container at room temperature, and they actually get chewier as they sit. I like to wrap individual bars in wax paper and stack them in a tin for gifting, they travel well and look homemade without being fussy. If you want to go the extra mile, drizzle melted chocolate over the top once they've cooled, or sprinkle a tiny pinch of flaky sea salt on each square for that sweet-salty punch. For longer storage, freeze them in a single layer, then stack with parchment between each bar, and they'll keep for up to three months.
- Warm them for 10 seconds in the microwave to bring back that fresh-from-the-oven chew.
- Cut them into smaller pieces for bite-sized treats at parties or cookie exchanges.
- Pair them with strong coffee or cold milk to balance all that caramel sweetness.
 Save
Save Every time I pull a pan of these out of the oven, I think about my neighbor and that first bite that convinced me to try making them myself. They've become my answer to every bake sale, birthday, and bad day, and I've never once regretted the hour it takes to make them.
Recipe FAQs
- → Can I make these bars ahead of time?
Yes, these bars keep exceptionally well in an airtight container for up to one week. They actually develop deeper flavor after sitting for a day, making them perfect for preparing in advance for gatherings or gifts.
- → What type of caramel works best?
Both store-bought and homemade caramel sauce work beautifully. If using store-bought, look for a smooth sauce without added mix-ins. Homemade allows you to control the sweetness level and achieve that perfect pourable consistency.
- → Can I substitute the pecans?
Absolutely. Walnuts provide a similar buttery crunch, while almonds add a slightly sweeter note. For those with nut allergies, sunflower seeds or pumpkin seeds can work, though the flavor profile will shift slightly.
- → Why is cooling time important?
The full 30-minute cooling period allows the caramel layer to set properly. Cutting too early will result in messy, runny squares. Patience during cooling ensures clean cuts and that signature chewy texture throughout.
- → How do I get clean cuts?
For perfect squares, use a sharp knife wiped clean between cuts. You can also chill the cooled pan in the refrigerator for 15-20 minutes before slicing to firm up the caramel layer even more, resulting in restaurant-quality edges.
- → Can I add sea salt?
A light sprinkling of flaky sea salt over the caramel layer before adding the crumb topping creates a stunning salted caramel variation. The salt enhances the chocolate and balances the sweetness beautifully.